
7 Tips for Choosing the Best RO Water Filter
Choosing a Ro Water Filter is not just about finding the smallest unit or the lowest price. It is about matching a system to your water, household, and maintenance habits. Clear water can still contain dissolved substances, while an unpleasant taste does not identify a specific contaminant. A recent water report can help you decide what needs attention. If you use a private well, testing through a qualified laboratory may be especially useful.
The seven tips in this guide focus on practical checks: contaminant reduction claims, independent certification, filter capacity, water use, installation, replacement costs, and ongoing maintenance. Look for certification that applies to the exact model and the contaminants you care about. A familiar label alone is not enough. Compare the stated daily output with your household’s needs, and check whether the unit requires adequate water pressure or a dedicated faucet. Small details matter. A filter that is difficult to maintain may sit unused, even if its specifications look impressive.
Reverse osmosis can reduce certain dissolved substances, but it is not a universal answer for every water concern. Read the product documentation, confirm replacement schedules, and consider the system’s wastewater and mineral-removal trade-offs. It is easy to overvalue a sleek design or a dramatic marketing claim. Those details may matter less than dependable testing and affordable upkeep. Even a careful comparison has limits; local water conditions and installation can change the result. These tips offer a grounded starting point, not a substitute for testing your water.
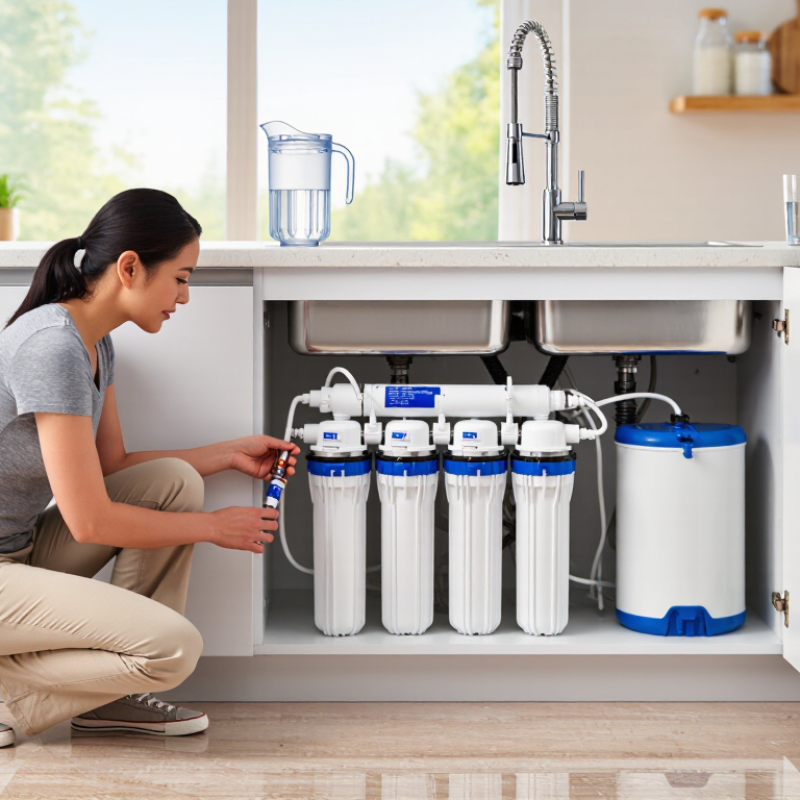
Test Source Water First: Measure TDS and Identify Target Contaminants
Before choosing an RO filter, test the water that will enter it. A handheld TDS meter gives a quick reading of dissolved ions, but it cannot identify which substances are present. A reading of 420 mg/L could reflect minerals, salts, or other dissolved material. The number alone does not tell you whether lead or arsenic is present.
The World Health Organization’s Guidelines for Drinking-water Quality report that water below 600 mg/L TDS is generally palatable, while water above 1,000 mg/L is increasingly unpalatable. These are taste observations, not health thresholds. The U.S. EPA lists 500 mg/L as a secondary standard for TDS, mainly related to aesthetic effects. A TDS meter is useful, but it is not a safety verdict.
For public water, check the latest Consumer Confidence Report for detected contaminants and local concerns. For a private well, use a certified laboratory and ask about risks tied to nearby land use, geology, and plumbing. Nitrate, arsenic, and lead may need separate tests; a basic TDS reading will miss their identities.
Then compare those results with an RO system’s documented reduction claims. NSF/ANSI 58 covers reverse-osmosis drinking-water systems, but certification applies to specific contaminant claims, not every possible impurity.
Even a clear test plan has limits: water conditions can change, and one sample is only a snapshot. That detail is easy to overlook. I would retest when the source changes or a plumbing concern arises.
Verify NSF/ANSI 58 Certification and Its Tested Reduction Claims
A reverse osmosis system’s NSF/ANSI 58 certification is useful only when you check what was actually tested. Look up the exact model in the certifier’s public directory, then compare its listing with the product’s performance data sheet. A similar model name is not enough; small design changes can affect results. Details matter.
Read each reduction claim individually. Certification may cover specific substances, such as lead or certain dissolved solids, but it does not mean the system removes every possible contaminant. Check the test conditions, stated reduction percentage, rated capacity, and replacement interval. For example, a filter tested at a particular flow rate may perform differently if household pressure is lower. Also note whether the claim applies to the complete system or only one component. Not every claim is equally clear. If the documents leave a key contaminant unaddressed, treat that as uncertainty rather than proof of removal. Certification is a helpful check, not a substitute for matching test results to your water report and maintaining filters on schedule. I’d be cautious about relying on a single headline number; it can hide important limits.
Compare Rated Capacity: Household RO Systems Commonly Offer 50–100 GPD
A rated capacity of 50–100 gallons per day is common for household reverse osmosis systems. GPD means gallons per day, but it is not a guarantee of the water you will collect at home. Ratings are measured under specified conditions, and actual output can drop when feed water is cold or pressure is low. Higher mineral content may also affect performance. A 75 GPD unit might produce less than its rating in a real kitchen. Check the operating conditions listed in the product documentation, not just the large number on the box.
That difference matters. Think about your household’s daily use: drinking, cooking, and filling a kettle can add up, especially with several people at home. A storage tank helps deliver water quickly, but it does not make the membrane produce water faster. Measure your routine. If you regularly empty the tank before dinner, a higher-capacity system or a larger tank may be worth considering. Filter age and maintenance also influence output, so capacity is only one part of the decision. I have found it easy to overestimate daily demand; keeping a simple water-use note for a few days can give you a more realistic estimate.
Compare Rated Capacity: Household RO Systems Commonly Offer 50–100 GPD
Gallons per day (GPD) is the rated production capacity under specified test conditions. Household RO systems commonly fall in the 50–100 GPD range; actual output can vary with water pressure, temperature, and feed-water quality.
Check Water Efficiency: Compare Each System’s Tested Recovery Rate
When comparing reverse osmosis systems, do not judge efficiency by a marketing phrase alone. Check the tested recovery rate: the share of feed water that becomes treated water under stated conditions. If a test feeds 10 liters and produces 2 liters of permeate, recovery is 20 percent. The remaining 8 liters are concentrate, though exact drainage can vary by design. Small detail, big difference. Look for test pressure, water temperature, and inlet-water quality beside the figure. A rate measured with warm, low-mineral water may not match a cold kitchen tap. Without those conditions, the number is hard to interpret.
Compare systems using the same test method and capacity, then consider household use. A higher recovery rate can mean less drain flow, but it does not prove better filtration or lower ownership cost. Check for a storage tank, filter replacement intervals, and output changes as feed pressure shifts. If possible, measure your own feed and reject water over a full operating cycle; a quick glass test can mislead. I would not treat one lab figure as a promise. Real homes vary. Still, a clearly documented recovery rate is a practical way to narrow choices before comparing maintenance and water-quality data.
Plan Filter Changes: Prefilters Often Need Replacement Every 6–12 Months
Prefilters are easy to overlook because they sit upstream from the reverse osmosis membrane. Yet sediment and carbon stages catch grit, rust, and chlorine before these reach more delicate components. Many systems call for prefilter changes every 6–12 months, but that range is only a starting point. Heavy use, cloudy well water, or seasonal changes in source water can shorten the interval. Check the system manual for its specific schedule, and write the installation date on a calendar or service label. Keep a log.
Waiting for water to taste different is tempting, but taste is not a dependable warning. A clogged sediment filter may reduce flow, while a depleted carbon filter can lose its ability to protect the membrane. Check sooner if your household uses more water than usual or the feed water carries visible sediment. Some changes are subtle. Follow the manufacturer’s instructions for shutting off the supply and relieving pressure before opening the housing. Use clean hands, seat the new cartridge carefully, and inspect for leaks after restarting the system. I would not stretch an interval just to avoid a small maintenance task; still, replacing filters too often wastes money. A simple record helps you find a sensible schedule for your own water and usage.
7 Tips for Choosing the Best RO Water Filter – Plan Filter Changes: Prefilters Often Need Replacement Every 6–12 Months
| Tip | Filter component | Typical replacement interval | What it does | Planning check |
|---|---|---|---|---|
| 1. Check the recommended service schedule | Whole RO system | Follow the system instructions; intervals vary by design and water conditions. | Keeps each stage working within its intended service life. | Record installation and replacement dates. |
| 2. Plan prefilter changes in advance | Sediment and carbon prefilters | Often every 6–12 months; check the system instructions. | Reduce sediment and chlorine before water reaches the RO membrane. | Consider earlier service if water use is high or incoming water has more sediment. |
| 3. Protect the RO membrane | RO membrane | Commonly about 2–5 years, depending on use and feed-water conditions. | Separates many dissolved substances from the water. | Check water quality and production rate; a change can indicate that inspection is needed. |
| 4. Include the final taste-polishing stage | Post-carbon filter | Often about every 12 months; follow the system instructions. | Helps reduce residual tastes and odors after the storage tank. | Replace sooner if taste or odor changes and the filter is due for service. |
| 5. Match the system to daily demand | System capacity and storage tank | Capacity is selected at purchase; tank condition should be checked during routine service. | Provides treated water at a rate and volume suited to household needs. | Estimate daily use and account for the time needed to refill the tank. |
| 6. Check water quality rather than relying on taste alone | RO output and incoming water | Test when setting up the system and periodically as appropriate. | Helps identify changes that may not be noticeable by taste or appearance. | Use suitable water tests and consult local water-quality information. |
| 7. Keep a simple replacement calendar | All replaceable cartridges | Set reminders based on each component’s service interval. | Makes routine maintenance easier to plan and track. | Keep a written log of dates, cartridge types, and any performance changes. |
Replacement intervals are general estimates. Actual service needs depend on system design, water quality, and household use; follow the instructions for your RO system.
